Academic Planning Masterclass
Successful planning is strategy (how) and tactics (what and when). Leverage Obsidian's Canvas & Project Plugin to plan visually and intuitively using: Maps, Kanban Boards, Calendars and Tables.
My Blog has moved
If you want new content, updates, and tips, check out my website.
As the year begins, we make plans and set goals.
Unfortunately, we know that most of these goals end up unaccomplished.
Or worse, haunting us with guilt.
To avoid this we can create a vision or a strategy first. This is motivational. Then we slowly break it down as we tackle parts of it. Our todo list stays short. In this tutorial we will use the Japanese system of Kanban to structure our todo.
If you’ve never heard of it, great! It’s simple and battle-tested over almost 80 years!
I consider this a masterclass in academic planning. There is little more that you will need for personal planning. Everything is done with Obsidian - my favourite tool.
We will use a lot of visual tools, to make our solution intuitive and beautiful.
So let’s get started with the bird’s eye view.
Think HOW you want to achieve your goals. Think big.
The Strategy
Using Obsidian’s Canvas feature, I created a plan for my next 3 years: The strategy. This is how it looks:
(If you want a TL;DR version of the strategy planning part, head over to Twitter and follow the thread, then come back to the next section of this tutorial.)
As we learn about the “unknown unknowns” of our strategy, it changes. Treat the strategy as a living thing, not a blueprint.
If you have seen the last edition of this newsletter, on how to build a visual reference manager, you are probably already familiar with Obsidians Canvas. It is an extremely minimalist version of a mind-mapping tool. It allows you to use notes directly on the canvas.
I have 3 guidelines to create my strategy. Feel free to improvise to suit your needs.
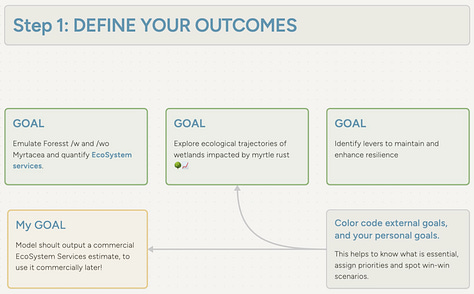
Define your goals - but differentiate what are your goals, and what is expected of you. Most often this aligns. Being explicit here will drive your motivation and satisfaction.
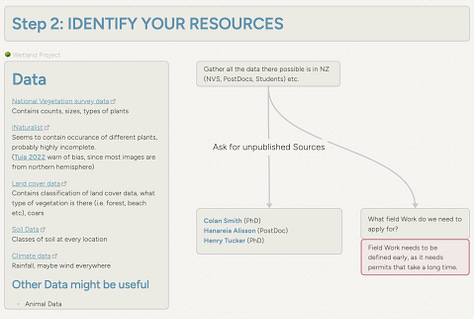
Identify the resources you will need: Data, permits, discussions. I am studying forests, so I need to go to the forest and “count the trees” first. This requires permits - a possible roadblock…
…Record roadblocks in your strategy. They are often resolved if identified early on.
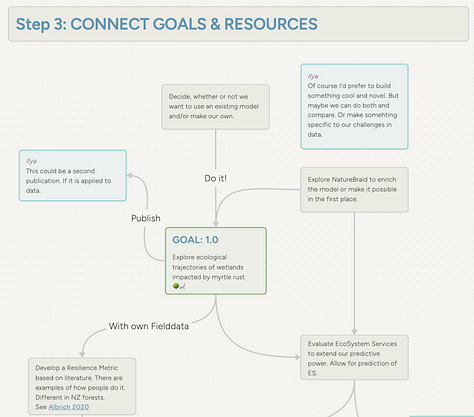
Connect your resources with actions to your goals. If your resource is data and your goal is “a predictive model” for this data - there are endless ways to create those. An action could be “use Python package XYZ” or “Ask Molly for support“.
As you define your actions, you might notice that further resources are required. You want to run a deep learning model on 4TB of data? → Get a supercomputer. Want to do statistical analysis → Maybe brush up your stats skills?
The finer these tasks are, the more we get from a strategy to a tactic. Keep it simple, don’t overthink.
Remember the formula: Resource + Action → Goal.
Zooming in: From Strategy to Tactics
Our strategy helped us to break our big goal into bite-size chunks, or actions. Ideally, we tackle those one at a time.
But in no way are you limited to stop here. Often it makes sense to go through multiple levels of mind maps.
In the example above one of the Goals was: “Explore Wetland Succession Trajectories“ (A fancy way of saying “How does a forest grow under various conditions”).
I further break it down in a separate canvas. This is how it looks:
Notice a few key things:
The “Actions” (grey) are becoming much more actionable. “Gather New Zealand Succession papers“ for example is a straightforward task of a few hours.
I use “Questions”(blue). Every Action tries to answer a question, or provide data. Recording questions is a pillar of good research. It is a requirement in my system of academic note-taking.
“Data”(purple) not everyone will need. It can be a great milestone to obtain/clean/prepare a good dataset.
My supervisor wrote me a helpful email (top left) - I integrated it into my vault and can now use it as a note. (Check out this Twitter thread to see how you can integrate a calendar to keep track of time-stamped notes).
Now it seems we have broken down our big plan to a set of much more actionable actions!
Rule of thumb: A task should be doable in less than 1-2 days, ideally aim at 2-4 hrs. Your week should not consist of more than 10-20 tasks.
The Tactics: Execution
You have a clear understanding of what needs to happen. Now let’s create a system to remember everything.
Understand: Your to-do list is NOT a few checkboxes, that you tick off as you go.
Instead, your tasks are like chess pieces that move on a board. From “todo” to “doing” to “done”, wait in “blocked” or disappear in “postponed”. They go back and forth.
This moving is done quite literally by using a so-called kanban board:
Here are the steps we need to get there:
Setup a folder structure for our project
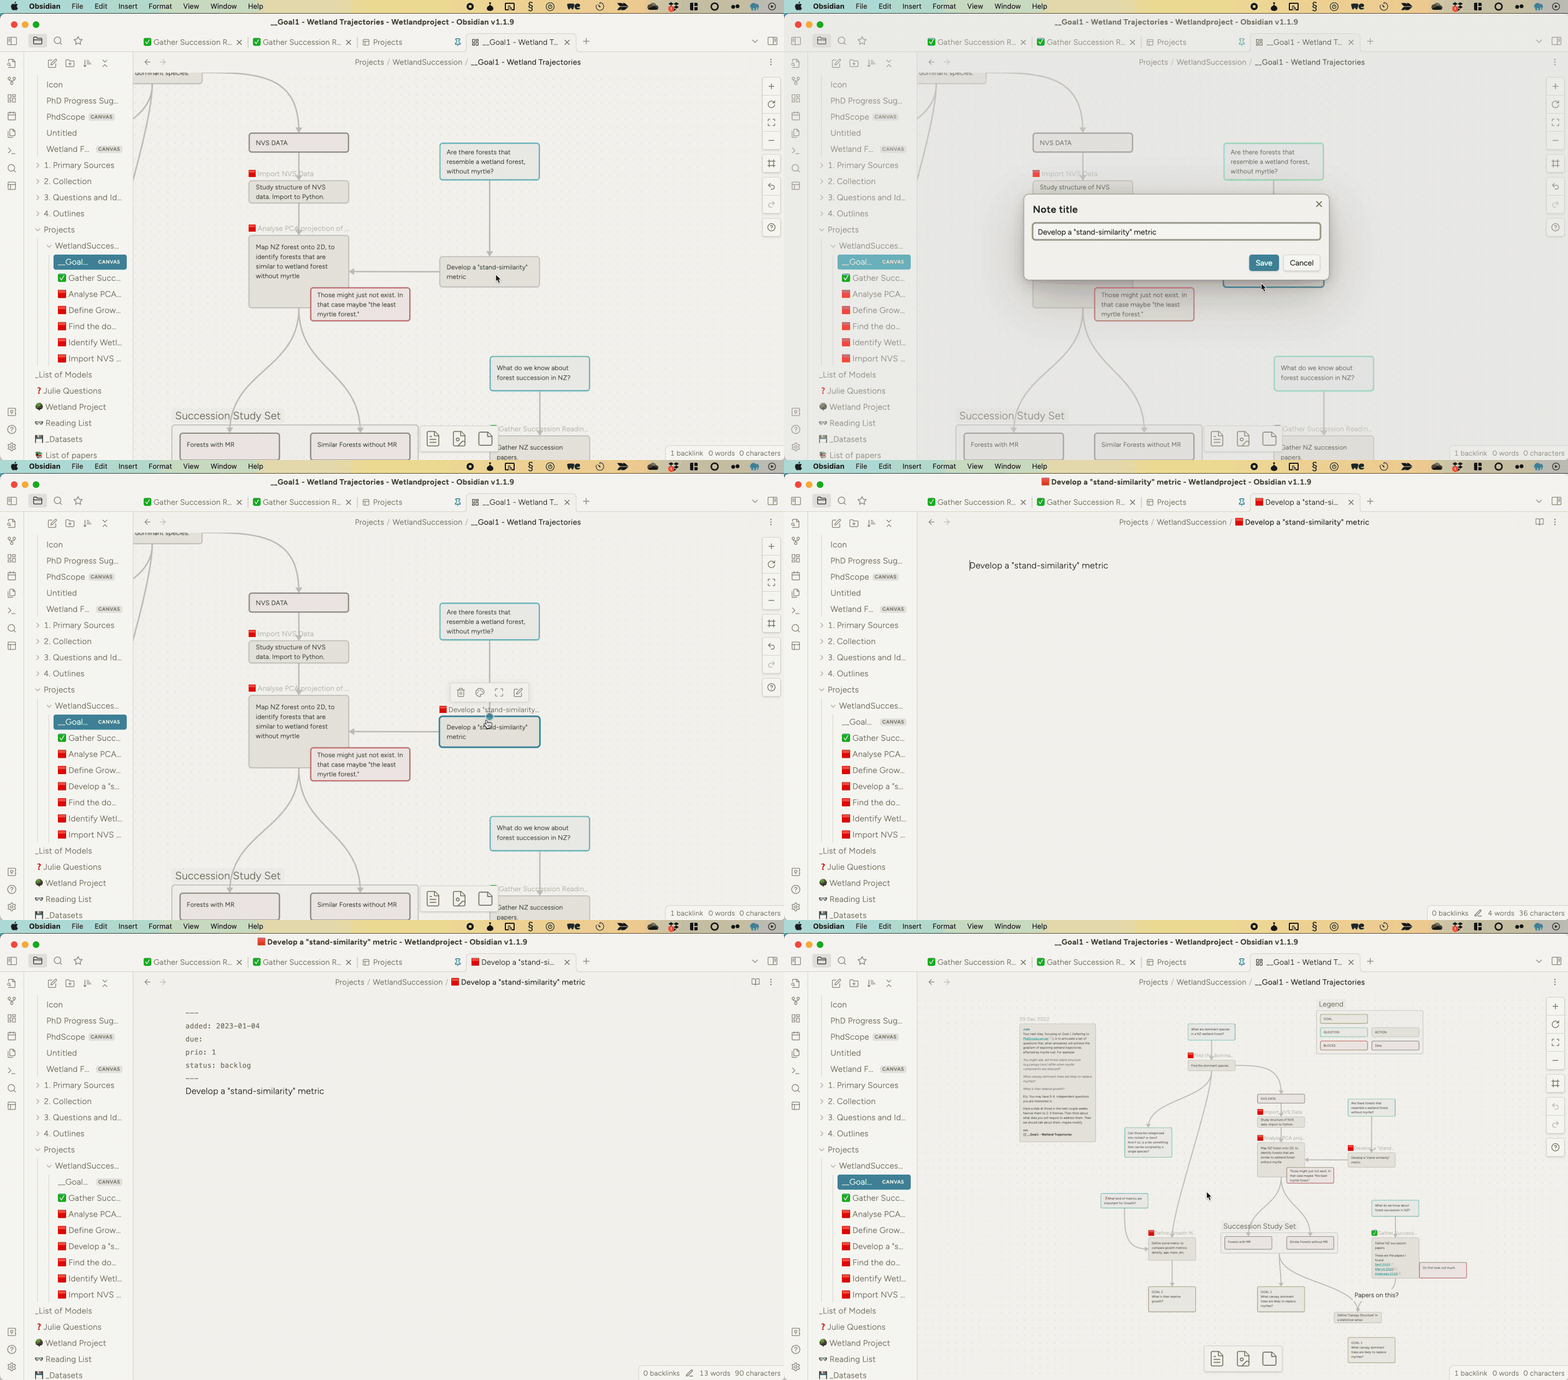
Create tasks by converting “cards” in our canvas into task notes.
Task notes will contain some extra information and emojis for overview.
Use the “Projects” plugin to display, filter, and highlight a task list
Use the Board and Calendar views for industry-standard project management.
For some people, this will be “overkill”. However, just going to step 2 will already one-up your planning skills.
Preparation: Setup folder structure
I prefer to have a folder for all projects + a folder for a single project. This way tasks don’t mix up. A project for me is a Canvas (our Strategy) and the task notes.
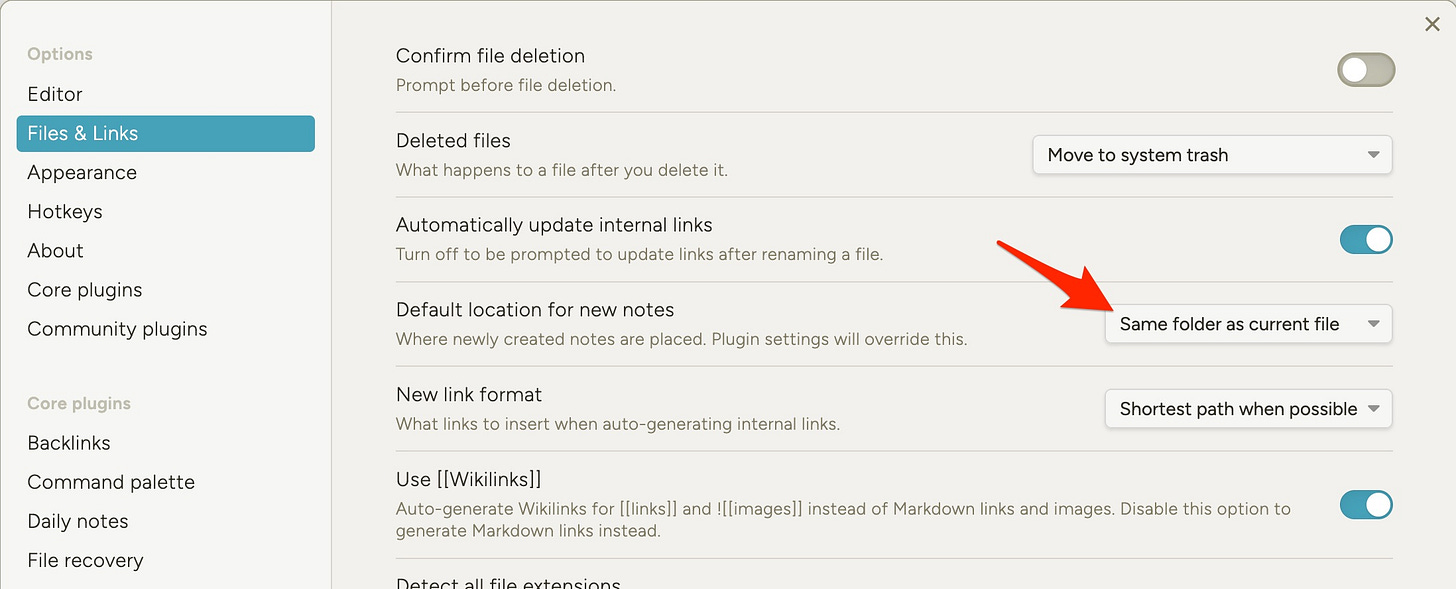
By default, Obsidian will store new notes in the root folder. This is extremely annoying, as you have to move every new note into its project folder.
Go to settings > Files & Links > Default location for new notes to change this behaviour. Instead, the notes will now appear in whatever folder you are currently at.
Convert Cards on your Canvas into Tasks
Cards in the Obsidian Lingo live inside the Canvas, notes live in the vault. But we can display notes on the canvas as well.
We need to convert our cards into notes, to work with them, annotate them, etc. I suggest adding an emoji to the title to signify whether something is done. It will be visible right on the canvas.
Right-click a card on your canvas and select “Convert to file”.
A surprisingly low-tech hack is to use 🟥 and ✅ emojis in the title. This way I can see on the canvas what is done and what isn’t. (Think of other emojis you like!)
Each note now needs something called “frontmatter” at the top. This is machine-readable meta-information describing the tasks state, due date, etc. It will be clear in a second why we need this frontmatter!
I use a template to quickly insert those for new tasks. Here is my minimalist template:
---
added: {{date:YYYY-MM-DD}}
due:
prio: 1
status: backlog
---
Create a new Project with “Projects” plugin
We will use the “Projects” plugin by Marcus Olsson in Obsidian. It is relatively new and not well supported on mobile yet. To my knowledge, it is the only one that offers the total flexibility we need, with the simplicity we want.
Install Projects and click the little project icon on the left.
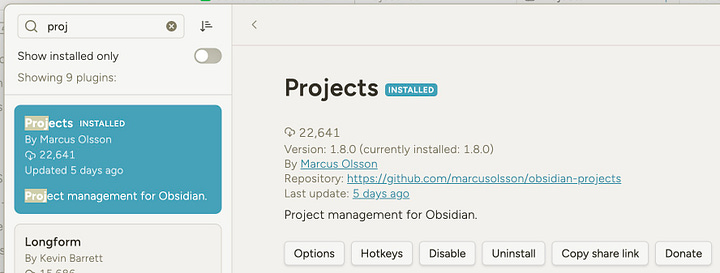
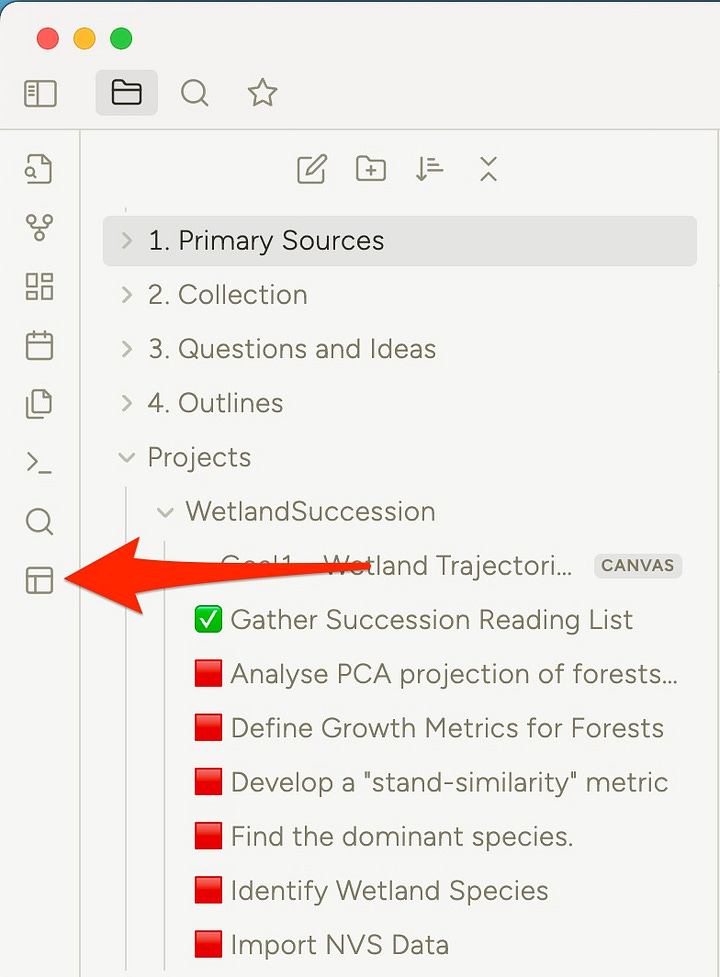
When prompted, click “Create a New Project”.
In the dialogue, the only crucial part is to set “Path” correctly. The rest is just for convenience. Here are the settings:
The Table View: Overview of Tasks
This is the default view.
The table view is pretty much like Excel. Note that our columns are the “frontmatter” fields we added to the notes! So if you need more columns, just add them in frontmatter to your notes.
You have filters and “conditional highlighting”. The one unusual thing is that to edit the note you have to click on the little numbers on the left.
There is one crucial piece of configuration you have to do in order to use the board view. Click on the three dots next to the “status” column and setup the options.
Here is my setup for different “states” a task can be in, you will see in a moment why this is necessary.
The Board View: Your Tasks move
By itself, the table view is not very useful. It shines when you have many tasks and need to filter. Much more useful is the board view. Let’s set one up.
Create a new view by using the new button at the top right and selecting “New View”,
In the dialogue, you give the view a name and select its type to be “Board”.
Configure the Status and Priority drop-downs as shown in the screenshot.
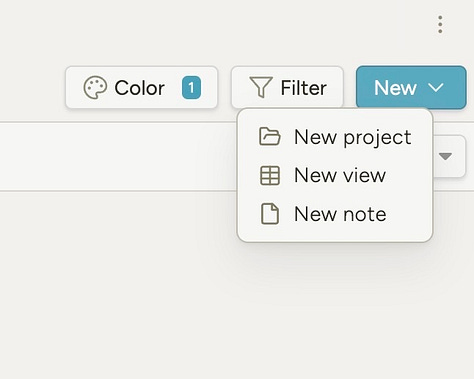
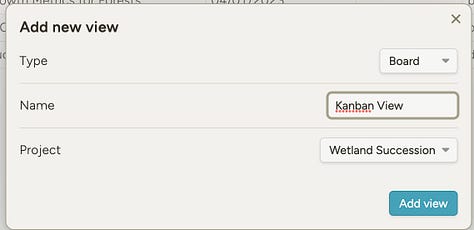
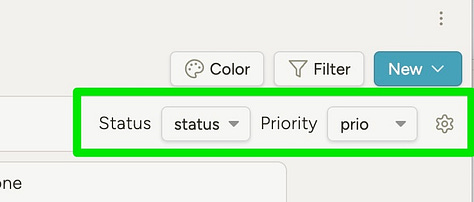
In the Kanban board methodology your tasks need to go from left to right. “Backlog” is your typical category to start at. (Backlogs tend to grow large… clean it occasionally)
Arrange your columns by dragging them to rearrange. You now have the full overview of the project and can rearrange the state per drag & drop.
Outside of academia, where you don’t need your vault of notes but instead more collaboration I recommend using Trello. It is just the board view done perfectly simple.
Click the tasks holding CMD (Mac) or CTRL (Win) keys to open them.
The Calendar view: For time-critical organisation
If you have tasks that are time-critical, the calendar view is useful. (Tasks that have a due date, I consider time-critical.)
In the Calendar view, you can easily drag & drop your tasks to change their due dates and prioritise your tasks.
You create a new calendar view by using the “New” button at the top. Select “due” as your Date field on the top right for the calendar to display notes on the due date.
Note: Only Tasks WITH a due date are displayed. This is what we want as our view now only shows what is time-critical.
Click the tasks holding CMD (Mac) or CTRL (Win) keys to open them.
Have as many views as needed
In this example, you probably noticed that the Project plugin is “just” a way of displaying the frontmatter data of your notes in a clever view.
Table displays ALL the metadata.
Board focuses the “state” and “priority”
Calendar focuses on “due” date
You can have as many board, calendar or table views as you like.
Configure each one to suit your needs. For example, you could have a board where each column is a person that is responsible for the task. Or a table view that only shows “unfinished tasks with high priority”. Or a calendar showing only the “things you completed” for personal motivation.
(Small side note: When you finish a task you have to add the ✅ emoji manually.)
Possibilities are limitless. But don’t overcomplicate. In practical terms, I end up using the Board view and see my tasks on the canvas.
Summary
In this tutorial, we learned.
Set up a strategic high-level plan as a Canvas in Obsidian.
Segment one sub-goal into a small tactical plan as another Canvas in Obsidian.
Keep the tasks doable (1-2 days max, better 4hrs) and actionable.
Extract the Canvas Cards into notes with a small 🟥 or ✅ icon in the title.
Enrich these with frontmatter information: “status” (backlog, blocked, done), “due” (date), etc.
Use the “Projects” plugin to display these tasks in 3 different views: Table, Board or Calendar.
Table allows us filter tasks perfectly and color-code them
Boards allow you to see the “status” of all tasks and move them from left to right.
Calendars emphasise the “due” date for time-sensitive tasks.
It is an elaborate and powerful setup. For most people only steps 1-3 will be relevant. Arranging things in a mind map with emojis to symbolise the completion is pretty awesome already.
A step in between is to use Trello, a separate online tool for easy project management. It excels at collaboration, but you can’t integrate your knowledge vault into it.
Please Share
Did you like this post? Did you find it too long? Confusing? Too many typos?
Please let me know in the 🔸anonymous feedback form🔸!
Follow me on Twitter, to have smaller but more frequent tips on your effortless academic journey.
If you like the ideas expressed here, please help me by sharing it to your folks on Twitter or via email.
Lastly, if you help me I help you : ) Any comments, feedback or questions are welcome in the comment section below.




i'm doing the same with the Strategies on Canvas part; but each task being a .md note is a big problem i think